Solution Deferred due to greylisting in cPanel

Solution Deferred due to greylisting in cPanel

Hmmm, why didn’t the email arrive?” Check in the Spam folder is also not there! Is it blocked on the server ? Aha, my guess turned out to be correct. This is my second experience not receiving emails. For the first time I forgot what happened, but for the second I can provide a solution.

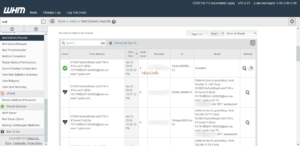
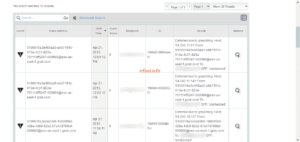
The following image that I got from WHM, indeed this solution is not just anyone can do it, only certain parties can access the WHM. So if you can’t receive the email, you can contact the email admin to check.

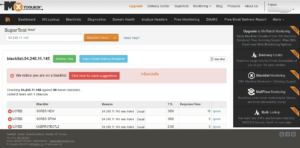
From the results of checking the IP in mxtoolbox.com like the picture below, wow scary is also the result, hahaha. Please take a look and draw your own conclusions.

But since I needed the email immediately for confirmation, I had to disable the Greylisting feature on cPanel. Greylisting is a cPanel feature that protects email accounts from spam or unwanted emails. Greylisting identifies incoming emails with three pieces of data, namely IP addresses, sender emails, and recipient addresses. By delaying the unknown part, Greylisting filters spam and allows legitimate emails to have a second chance to be skipped.

Here’s how :

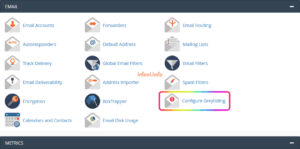
  1. Log in to cPanel and select Email – Configure Greylisting.

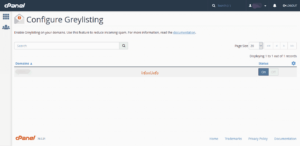
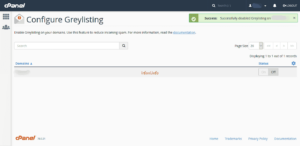
  1. Select the domain you want to deactivate and then click Off, making sure the result is successful.

  1. Try again asking the sender server to send the email, it should now be successfully received. If you are still experiencing problems, you can check the error displayed.

Please make sure to check carefully when the Greylisting feature is disabled, the impact of spam emails will be higher. Thanks.

 

CBN Email Guide in Ms. Outlook 2007

CBN Email Guide in Ms. Outlook 2007

Continuing with the previous guidance, here is the CBN email guide in Ms. Outlook 2007.

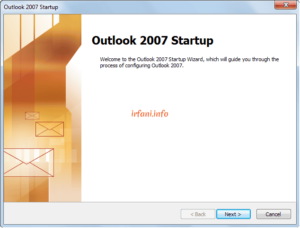
  1. Open Ms. Outlook 2007, here’s what it looks like if you’re just opening it for the first time, click Next. If you’ve opened it before, proceed to step 9.

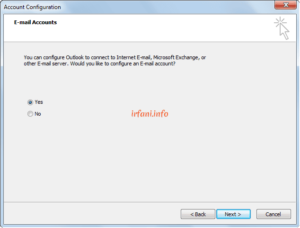
  1. Select Yes, click Next.

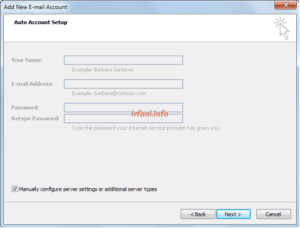
  1. Select Manually configure server settings or additional server types, click Next.

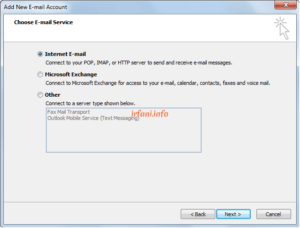
  1. Select Internet E-mail, click Next.

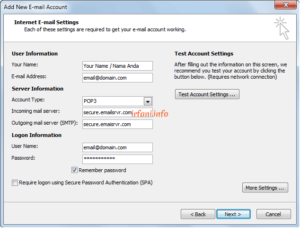
  1. Fill in the following data and then click More Settings.

Your Name : Your name (which will be displayed).

E-mail Address: email address.

Account Type : POP3.

Incoming mail server : secure.emailsrvr.com.

Outgoing mail server : secure.emailsrvr.com.

User Name: email address.

Password : email password.

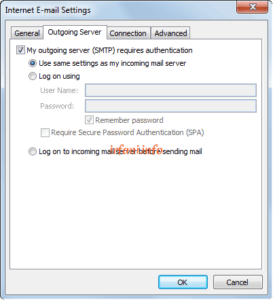
  1. Click tab Outgoing Server dan check My outgoing server (SMTP) requires authentication.

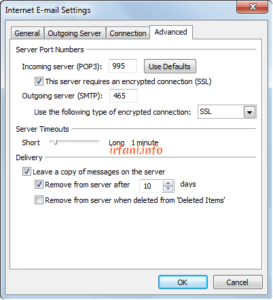
  1. Click the Advanced tab and fill in the following image then click OK.

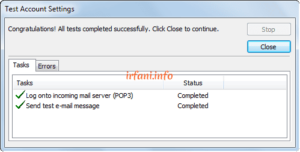
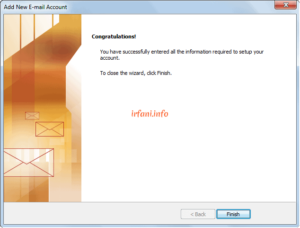
  1. Click Test Account Settings and make sure the result is like the following image then click Close – NEXT – Finish. Until this step, the email configuration process has been completed.

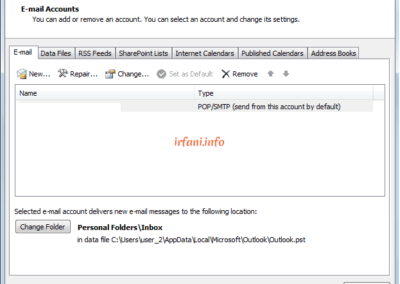
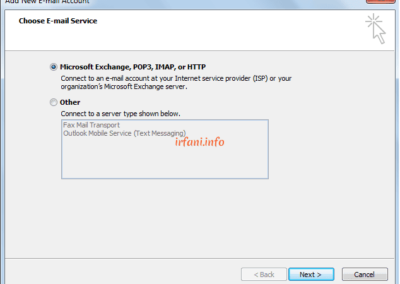
  1. Click on Tools – Account Settings –  Email tab – New – Microsoft Exchange, POP3, IMAP or HTTP – Next and go back to step 3.

You have been able to try to receive and send e-mail from Ms. Outlook 2007. Good luck, thank you.


CBN Email Guide on Android

CBN Email Guide on Android

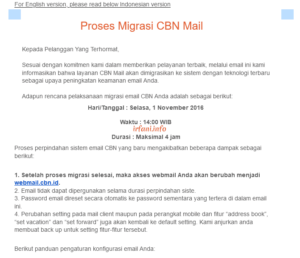
If you are a long-time user of CBN email, around September – October 2016 you will certainly receive information via email that CBN will migrate your email to the latest server. In order to receive and send emails, of course, you need the latest email configuration guide.

Here’s a guide to CBN emails on Android.

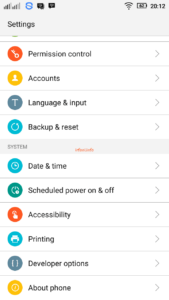
  1. Click Settings – Accounts.

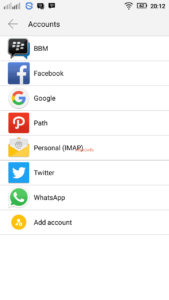
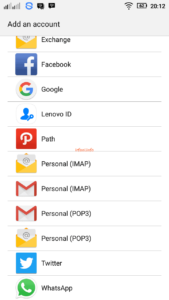
  1. Select Personal (IMAP).

  1. Select Personal (POP3).

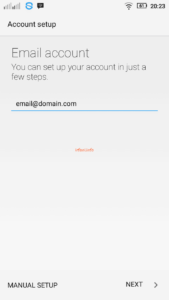
  1. Fill in the full email address in the Email account, click NEXT.

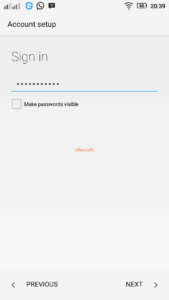
  1. Fill in the email password in Sign in, click NEXT.

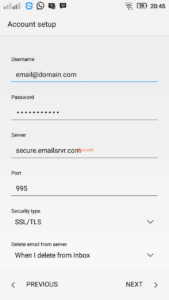
  1. On the server, fill in the emailsrvr.com and 995 on the Port and select SSL/TLS on the Security type and click NEXT.

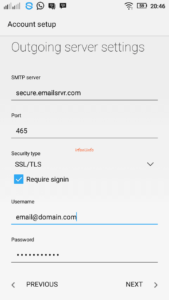
  1. In Outgoing server settings, enter emailsrvr.com in SMTP server and 465 in Port then select SSL/TLS in Security type, check Require signin then click NEXT.

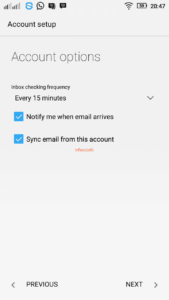
  1. Select the frequency of the desired email check time, in this picture then every 15 minutes the cellphone will check the email. Check on Notify me… and Sync email… to get notified when you receive an incoming email and then click NEXT.

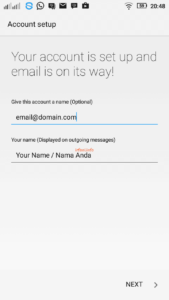
  1. Give this account a name on Give this…, I recommend filling it with an email address to make it easier to distinguish if later you will add another email address in your HP device and to Your name … can be filled in your full name and then click NEXT.

The email configuration process is complete, you can try to receive and send emails from your cellphone. To see email guidance on other apps or devices, you can see it here.

Note:

The image in this article may be different from your Android cellphone, for that just fill in the following info:

Incoming Mail

Username : email address

Password : password email

POP 3 / Incoming Server : secure.emailsrvr.com

Port : 995

Security type : SSL/TLS

Outgoing Mail

SMTP server : secure.emailsrvr.com

Port : 465

Security type : SSL/TLS (Accept all certificates)

Centang Require sign-in

Username : email address

Password : password email

Good luck, thank you.