MX and A records on 2 Different Servers

MX and A records on 2 Different Servers

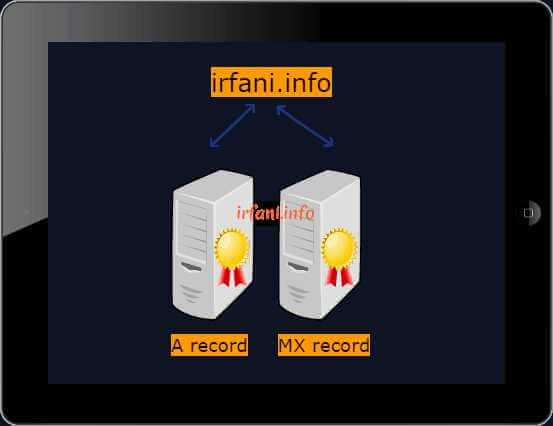
If you read the title above, is it possible? I asked 2 different hosting places in Indonesia about this and it turned out to have different answers, namely “For domains can only be directed to one hosting” and “it can be done by pointing A record to our hosting”, so which is the correct answer? Of course, the second answer is correct, even if I google it is likely that I will get the same answer. But in this case we have to be more observant before doing this, misanalyzing can result in one of the services not running well.

Ok we’ll play for a moment before you read my answer why I chose the second one, so please pay close attention.

Foreword:

So far, if I buy a domain and hosting, the domain zone record will be created automatically after the domain account is created and also my experience when I was still playing cPanel to WHM, until this paragraph, hopefully there is an understanding.

If there are no changes to the record, usually we will create a website and email in one hosting, for websites generally there are not too many configurations, especially if you install it from Softaculous. For email, if we set it up on a PC or cellphone, generally use the same POP and SMTP, that is, mail.namadomain.com, different things can be found if you look at the guide in Webmail, you can use a different POP and SMTP name. Hopefully there is still an understanding until here.

Then what if we want to create or move one of them to another server or hosting that of course has a different IP? In this case I will move my website to a new hosting with an IP of 216.239.38.120, for emails still on the old host.

Let’s play:

Here I will inform you of my currently active domain zone record, before you read the next paragraph, I ask you to make the answer on a piece of paper first so that it can be a comparison of the process I have done.

1, 2, 3, 4, 5……..1000 tik tok tik tok, time is up, ok save your answer and let’s see the process I am working on. Oh yes, to be sure, I provide information about A and MX records irfani.info from various sources.

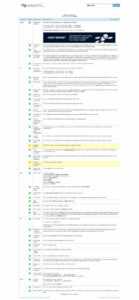
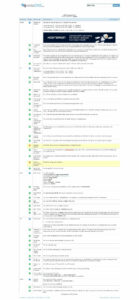
Source intodns.com

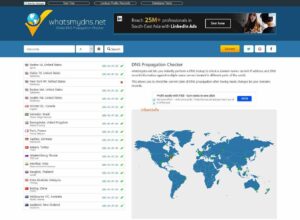
Source whatsmydns.net

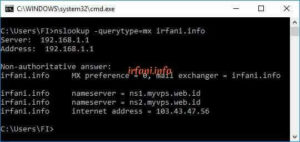
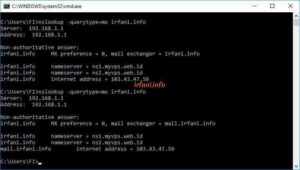
ISP server source

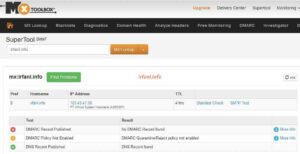
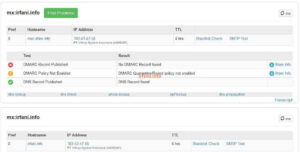
Source mxtoolbox.com

I’m going to change it through the old cPanel hosting, here’s how:

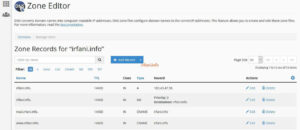
  1. Log in to cPanel and select Zone Editor.

  1. Notice in the main image, Type MX Destination: irfani.info and irfani.info have a CNAME to irfani.info which means that these two records refer to A record irfani.info and if we change A record from irfani.info i.e. IP 103.43.47.56 to another IP, in this experiment it is 216.239.38.120, then after the deployment of the email service will not work because it has changed IP address, on the other hand, if I fill in the POP and SMTP with IP 103.43.47.56, then the email will still work.

  1. For this reason, I will change theirfani.info from CNAME type to A record, so that when A record changes, the email will remain at IP 103.43.47.56.

  1. Click Edit, change the CNAME to A in Type, then fill in 103.43.47.56 in the Record and click Save Record.

Before

After

  1. Next I will change the MX from irfani.info to irfani.info, click Edit, just add the mail. (use a period) in the Destination column, so that it becomes mail.irfani.info and then click Save Record.
  2. Then I will change A record from irfani.info, click Edit, change the IP 103.43.47.56 to 216.239.38.120 then click Save Record, until the result becomes as follows and wait until the deployment period is complete, how long? Generally, ISPs inform 1 x 24 hours, but usually approximately 1 hour has been completed.
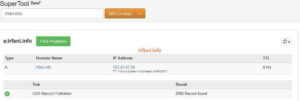
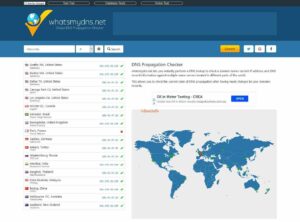
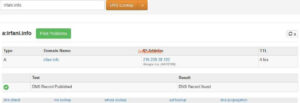
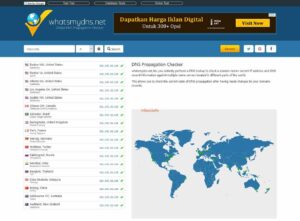
  3. I used to check the deployment on whatsmydns.net sites (I can find out  the DNS in a country) and www.mxtoolbox.com, for local I just use nslookup from  the command prompt. The following are the results of the changes in the 2 records:

Source whatsmydns.net, still in the process of spreading

Source mxtoolbox.com, IP has changed

Source whatsmydns.net, IP has changed

Source intodns.com, IP has changed

ISP server source, MX has changed

Source mxtoolbox.com, MX has changed

  1. If it has changed, we can try it right away, in the email I can’t provide info because the result is fixed (as if it hasn’t changed) and the result of A record is that the appearance of my site changes to a Google page, because I use a Google IP, hehehe.

If you have a different answer but the result is still the same, please let me know through the comment section so that I can learn as well. This is the information that I can provide, hopefully it will be useful. Thanks.

 

Microsoft Office Picture Manager Installation

Microsoft Office Picture Manager Installation

For those of you who have just installed Ms. Office 2013 and deleted Ms. Office 2007, you will definitely not find Ms. Office Picture Manager (MOPM), because it will no longer be available on Ms. Office 2013 and above versions. Don’t be discouraged and keep smiling because MOPM is very easy to download and install.

To shorten the time, let’s do the following:

  1. Download and install the app from SharePoint Designer 2007 (about 296 MB).
  2. By defaults MOPM is automatically selected, so during the installation process just click Continue – Install Now – Install Now – Close.
  1. Once the installation process is complete, we will change all image file extensions (*.jpg, *.png etc.) to be opened by default by MOPM.
  2. Right-click the image file you want to open and select Open withChoose another app, search for MOPM and don’t forget to check the Always use this app to open list … files.

The result will be like the picture above, good luck, thank you.


Connecting Wifi in Windows 7

Connecting Wifi in Windows 7

Actually, this method is very easy, but often it turns out that there are still a handful of people who don’t know how to do it, for that I made this article. Oh yes, why is there no guide in Windows XP ? Sorry, I forgot and when I wanted to make it there was no longer a device, so I immediately made it in Windows 7, here’s how:

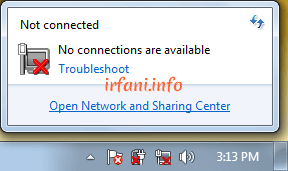
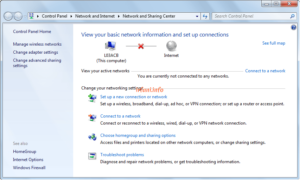
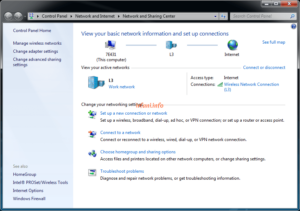
  1. Make sure the status of the Wi-fi icon is enabled, if there is no Wi-fi icon or there is a cross on the systray near the clock then it doesn’t seem to be activated, to make sure it is right-click the LAN icon at the bottom right and select Open Network and Sharing Center.

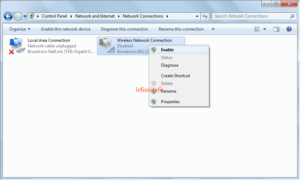
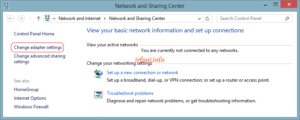
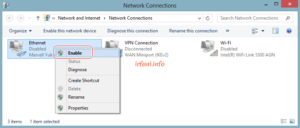
  1. In the Network and Sharing Center window, click Change adapter settings, make sure the Wi-fi to be used is Enabled, if it is still Disabled, right-click the Wi-fi and select Enable, it will change to Enable with an icon like the signal in the systray.

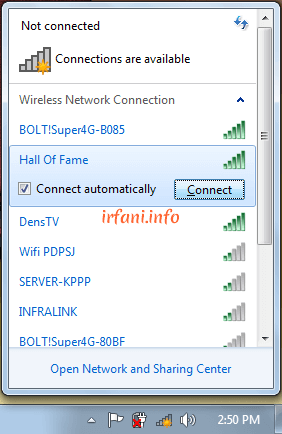
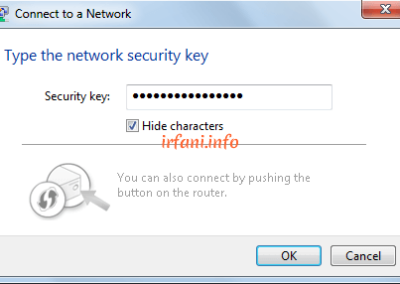
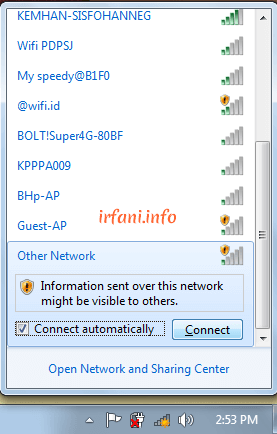
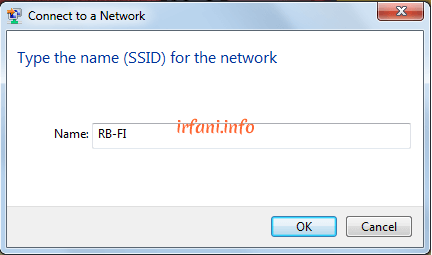
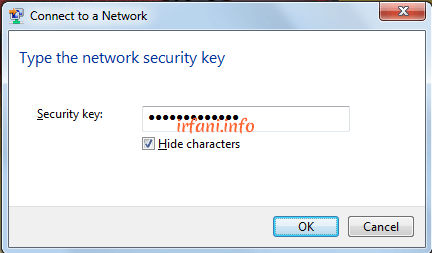
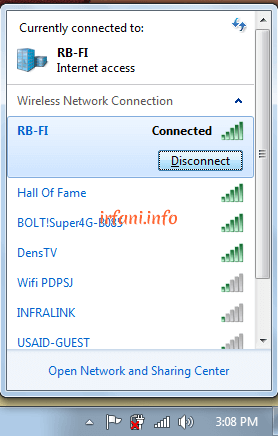
  1. Click the Wi-fi icon then the wireless name/SSID that is visible around will appear, select the SSID, check the Connect automatically check list if you want to connect automatically then click Connect, then a password box will appear, fill in the appropriate password then click OK, automatically if there is no problem with the IP address it will connect to the device, but if it fails to connect, please check further with the device or related parties.

If the wireless name you are looking for does not appear, then it is possible that the wireless name/SSID is hidden, select Hidden Network, click Connect then an SSID box will appear that must be filled in according to what is used (case sensitive), the next way can see the paragraph above. If the connection has been successful then the Wi-fi icon will change

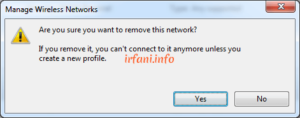
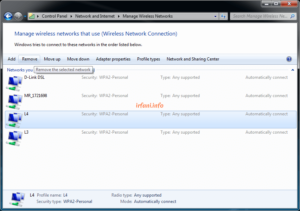
  1. If you want to remove the SSID due to a connection failure, which can be caused by a change in the password on the SSID, the trick is to click the Wi-fi icon and select Open Network and Sharing Center – Manage wireless networks.

  1. Select the SSID you want to remove then click Remove and select Yes.
That’s the information I can convey, hopefully it can reconnect the relationship that was disconnected before, wireless I mean, not the “ehm ehm” (just kidding).
 

Windows 8 & 8.1 PPPoE Guide

Windows 8 & 8.1 PPPoE Guide

This guide is similar to the one I have created before here, for the purpose and topology is also the same, only the steps are different. Here’s how PPPoE in Windows 8 & 8.1.

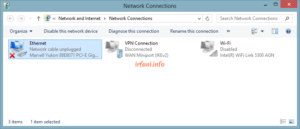
  1. Make sure the Ethernet status is Enabled and the cross (LAN cable please remove first) as shown above, to make sure it right-click the LAN icon at the bottom right and select Open Network and Sharing Center.
  2. In the Network and Sharing Center window, click Change adapter settings, make sure the Ethernet to be used is Enabled, if it is still Disabled, right-click the Ethernet and select Enable, it will change to Enable with a cross. If Ethernet does not appear, please make sure that the driver is installed correctly.

  1. Connect the end of the LAN cable to the wall jack) and the other end of the cable to a PC or laptop, the LAN indicator will turn into an exclamation mark, if you still get a cross, you must check the LAN cable and the connected device (port or configuration).

Note: this connection is not related to a pre-configured IP address so a static/dynamic IP is not required, as it will get a new IP address obtained from the ISP, generally in the form of a Public IP.

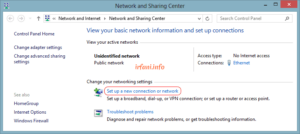
  1. Back to Network and Sharing Center then click Set up a new connection or Network.

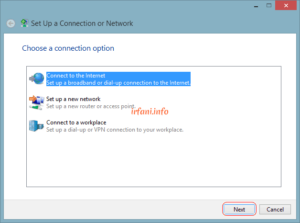
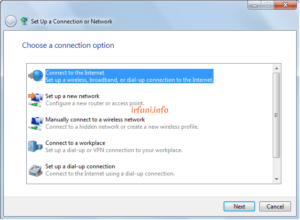
  1. Select Connect to the Internet and then Next.

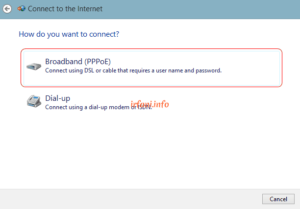
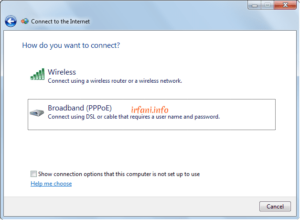
  1. Select Broadband (PPPoE).

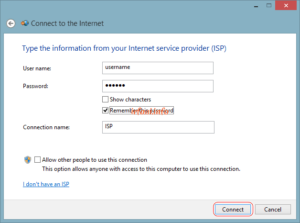
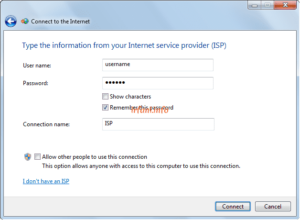
  1. Fill in the username and password provided by the ISP, if you use multiple ISPs, it is recommended that the connection name be given the name of the ISP, then click Connect.

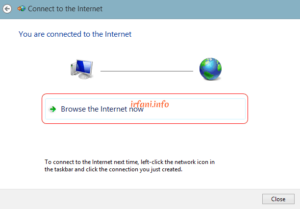
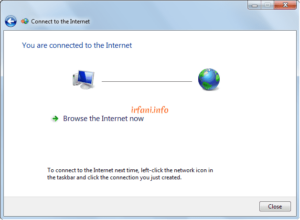
  1. If successful, it will appear as shown in the following image and the LAN indicator has changed to Connected, click Browse the Internet now to start browsing or click Close to close the window, if the image does not appear as below or a certain error appears, you can ask the ISP, until this step the PPPoE guide has been completed.

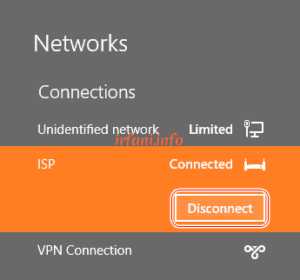
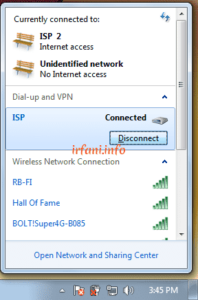
  1. Don’t forget to disconnect when you’re done so that the connection session doesn’t “hang” from the ISP’s side. For that, click the LAN icon at the bottom right, select the name PPPoE and then click Disconnect.

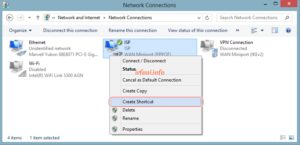
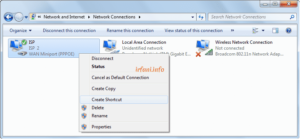
  1. To make it easier to access the PPPoE next, you can create a shortcut on the Desktop by right-clicking the PPPoE name and then selecting Create Shortcut.

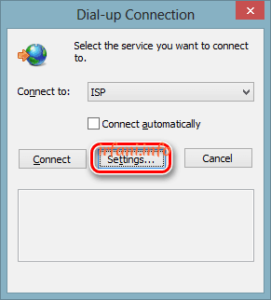
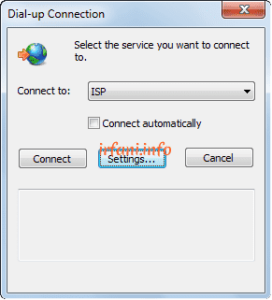
  1. If at some point the Dial-up Connection window appears like the image below, click Settings.

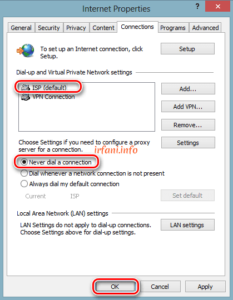
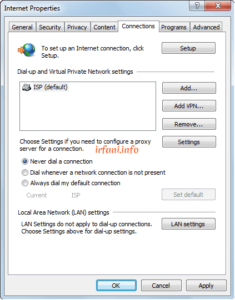
  1. On the Connections tab, select the ISP/PPPoE name and then select Never dial a connection and click OK.

If you are still experiencing slowdowns or inappropriate bandwidth, please contact the relevant ISP. Good luck and a great day.


Windows 7 PPPoE Guide

Windows 7 PPPoE Guide

This guide is similar to the one I have created before here, for the purpose and topology is also the same, only the steps are different. Here’s how PPPoE in Windows 7.

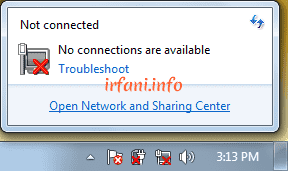
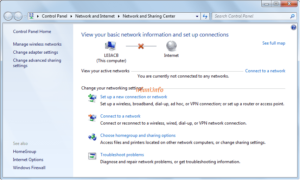
  1. Make sure the Ethernet status is Enabled and the cross (LAN cable please remove first) as shown above, to make sure it right-click the LAN icon at the bottom right and select Open Network and Sharing Center.
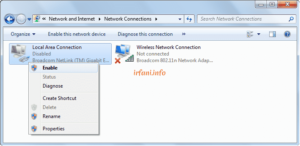
  2. In the Network and Sharing Center window, click Change adapter settings, make sure the Ethernet to be used is Enabled, if it is still Disabled, right-click the Ethernet and select Enable, it will change to Enable with a cross. If Ethernet does not appear, please make sure that the driver is installed correctly.

  1. Connect the end of the LAN cable to the wall jack and the other end of the cable to a PC or laptop, the LAN indicator will turn into an exclamation mark, if you still get a cross, you must check the LAN cable and the connected device (port or configuration) again.

Note: this connection is not related to a pre-configured IP address so a static/dynamic IP is not required, as it will get a new IP address obtained from the ISP, generally in the form of a Public IP.

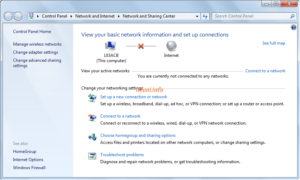
  1. Back to Network and Sharing Center then click Set up a new connection or Network.

  1. Select Connect to the Internet and then Next.

  1. Select Broadband (PPPoE).

  1. Fill in the username and password provided by the ISP, if you use multiple ISPs, it is recommended that the connection name be given the name of the ISP, then click Connect.

  1. If successful, it will appear as shown in the following image and the LAN indicator has changed to Connected, click Browse the Internet now to start browsing or click Close to close the window, if the image does not appear as below or a certain error appears, you can ask the ISP, until this step the PPPoE guide has been completed.

  1. Don’t forget to disconnect when you’re done so that the connection session doesn’t “hang” from the ISP’s side. For that, click the LAN icon at the bottom right, select the name PPPoE and then click Disconnect.

  1. To make it easier to access the PPPoE next, you can create a shortcut on the Desktop by right-clicking the PPPoE name and then selecting Create Shortcut.

  1. If at some point the Dial-up Connection window appears like the image below, click Settings.

  1. On the Connections tab, select the ISP/PPPoE name and then select Never dial a connection and click OK.

If you are still experiencing slowdowns or inappropriate bandwidth, please contact the relevant ISP. Good luck and a great day.