CBN Email Guide on Android

CBN Email Guide on Android

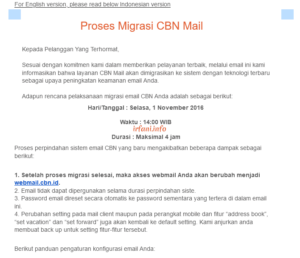
If you are a long-time user of CBN email, around September – October 2016 you will certainly receive information via email that CBN will migrate your email to the latest server. In order to receive and send emails, of course, you need the latest email configuration guide.

Here’s a guide to CBN emails on Android.

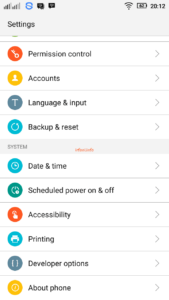
  1. Click Settings – Accounts.

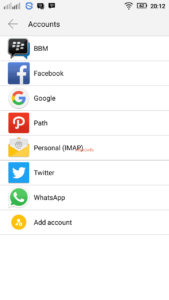
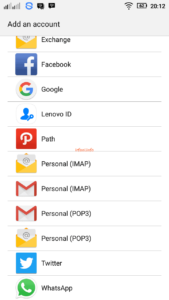
  1. Select Personal (IMAP).

  1. Select Personal (POP3).

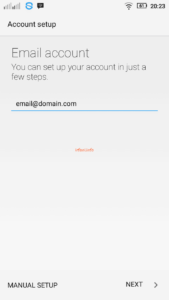
  1. Fill in the full email address in the Email account, click NEXT.

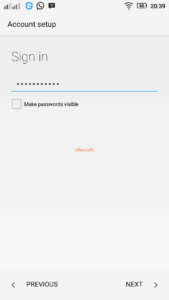
  1. Fill in the email password in Sign in, click NEXT.

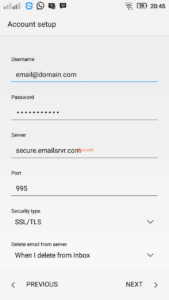
  1. On the server, fill in the emailsrvr.com and 995 on the Port and select SSL/TLS on the Security type and click NEXT.

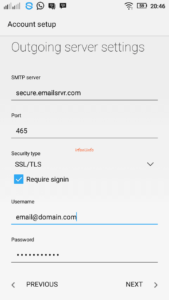
  1. In Outgoing server settings, enter emailsrvr.com in SMTP server and 465 in Port then select SSL/TLS in Security type, check Require signin then click NEXT.

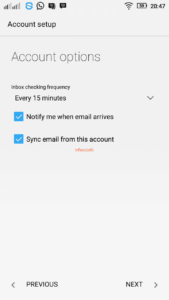
  1. Select the frequency of the desired email check time, in this picture then every 15 minutes the cellphone will check the email. Check on Notify me… and Sync email… to get notified when you receive an incoming email and then click NEXT.

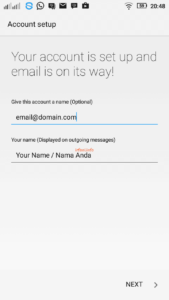
  1. Give this account a name on Give this…, I recommend filling it with an email address to make it easier to distinguish if later you will add another email address in your HP device and to Your name … can be filled in your full name and then click NEXT.

The email configuration process is complete, you can try to receive and send emails from your cellphone. To see email guidance on other apps or devices, you can see it here.

Note:

The image in this article may be different from your Android cellphone, for that just fill in the following info:

Incoming Mail

Username : email address

Password : password email

POP 3 / Incoming Server : secure.emailsrvr.com

Port : 995

Security type : SSL/TLS

Outgoing Mail

SMTP server : secure.emailsrvr.com

Port : 465

Security type : SSL/TLS (Accept all certificates)

Centang Require sign-in

Username : email address

Password : password email

Good luck, thank you.


Connecting a Bluetooth Headset in Windows 10

Connecting a Bluetooth Headset in Windows 10

Do you have a Bluetooth headset and there is also a Bluetooth feature on your laptop? Let’s try to connect the device so that you can listen to music in a different way. Let’s just practice it:

  1. Enable Bluetooth on your headset and laptop.
  2. Generally, the settings in Bluetooth headsets  are passive because they only receive transmissions from other devices, so in this there is nothing to do.
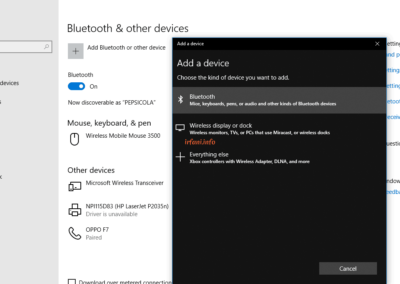
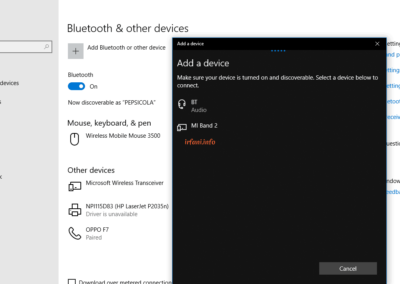
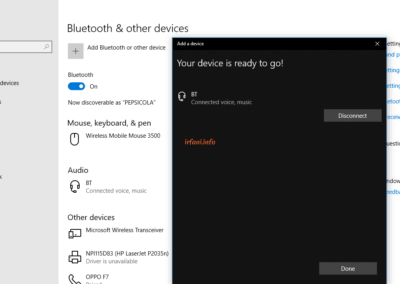
  3. On a laptop, click the Bluetooth icon in the Taskbar and select Add a Bluetooth Device, a new window will open and click Add Bluetooth or other device and select Bluetooth then it will start the search process. If the headset device has been found, click the name of the device for the pairing process, wait for the process to complete, and then click Done.
  1. You can try listening through the headset to make sure the above steps have worked.
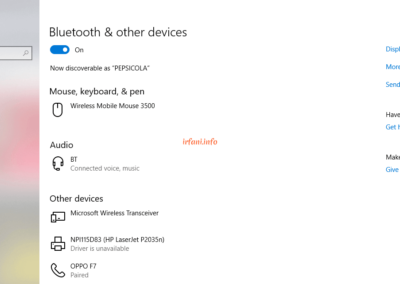
  2. If you turn off the laptop, then the connection will be automatically disconnected, to reconnect it, click Add a Bluetooth Device again and select the headset in Audio that has been connected before, click Connect until the status is Connected voice, music.

  1. To disconnect, click Disconnect or Remove device to remove the connected device.

Good luck.


Solving the Unable to Reset Your PC Problem

Solving the Unable to Reset Your PC Problem

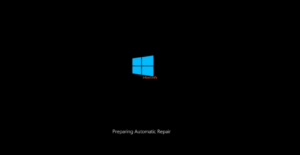
“Mi, can you please check my laptop?” what’s the problem Dy ? “Dead”, that’s what she said. I tried to check the laptop and when I turned it on, Preparing Automatic Repair always appeared. I asked before what she doing before, but she said she didn’t know.

I know that Windows 10 has a feature that makes it easy to repair the OS itself if there are problems without the need for third-party applications, for that I tried to fix it from the Troubleshoot – Advanced options menu, from the 3 options I tried, namely System Restore, Startup Repair and Go back to the previous build, the result still failed.

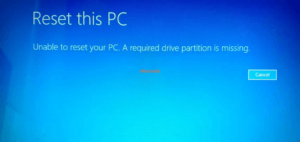
Finally I tried Troubleshoot – Reset this PC and the result was Unable to Reset Your PC. A required drive partition is missing. I tried browsing to get a solution to the problem, and it finally worked.

Here’s how I did it, still in the Troubleshoot – Advanced options menu, select Command Prompt, after opening the following command type along with press Enter when finished:


BOOTREC /SCANOS

BOOTREC /FIXMBR

BOOTREC /FIXBOOT

BOOTREC /REBUILDBCD

To exit, select Exit, the result is that Windows 10 is back to normal, thank God.


Connecting Wifi in Windows 10

Connecting Wifi in Windows 10

Previously I have created a guide for Windows 7 here, next in this article is a guide for Windows 10. Why is there no Windows 8 and 8.1 ? For both Windows, it is not much different from Windows 10. Here’s a guide to connecting to Wi-Fi in Windows 10..

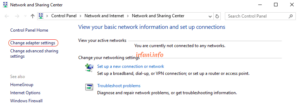
  1. Make sure the status of the Wi-fi icon is enabled, if there is no Wi-fi icon or there is a cross on the systray near the clock then it doesn’t seem to be activated, to make sure it is right-click the LAN icon at the bottom right and select Open Network and Sharing Center.

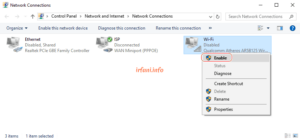
  1. In the Network and Sharing Center window, click Change adapter settings, make sure the Wi-fi to be used is Enabled, if it is still Disabled, right-click the Wi-fi and select Enable, it will change to Enable with an icon like the signal in the systray.

  1. Click the Wi-fi icon then the wireless name / SSID that is visible around will appear, select the SSID, check the Connect automatically check list if you want to connect automatically then click Connect, then a password box will appear, fill in the appropriate password then click Next, automatically if there is no problem with the IP address it will connect to the device, but if it fails to connect, please check further with the device or related parties.

If the wireless name you are looking for does not appear, then it is possible that the wireless name / SSID is hidden, select Hidden Network, click Connect then an SSID box will appear that must be filled in according to what is used (case sensitive), the next way can see the paragraph above. If the connection has been successful then the Wi-fi icon will change.

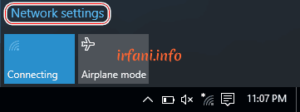
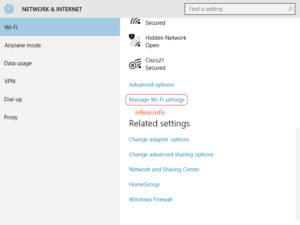
  1. If you want to delete the SSID due to a connection failure, which can be caused by a change in the password on the SSID, the trick is to click the Wi-Fi icon and select Network settings, scroll down and then click Manage Wi-Fi settings.

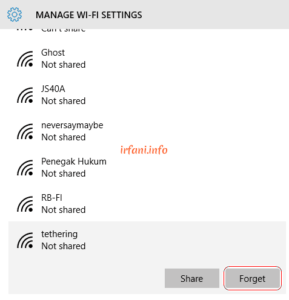
  1. Select the SSID you want to remove and then click Forget.

That’s the information I can convey, hopefully I can reconnect the relationship that was disconnected before, wireless, I meant, not the “ehm ehm”, hahaha.


Change Folder Location

Change Folder Location

For those of you who have installed Windows XP OS and other Windows series, by default the hard disk partition is generally made into 2 partitions, namely C for system and D for Data. Windows will create folders of Documents, Pictures, Music and so on following the partition where Windows is installed and placed according to the username you created.

Some of us don’t usually change the location of the folder. It’s legal as long as Windows is normal so there is no need to reformat it because you may think that the data will be stored in the D partition later.

When we start installing additional programs such as Ms. Office, browser, download manager, etc. that need a place to store, it will follow the location of Windows by default. The obstacle that I often find is having to move the folder when Windows has a problem so it has to be reformed, I use the word format because it will definitely delete the partition, if you don’t want to delete the partition, it can be installed by overwriting the old location of Windows (assuming it is still installed in the same partition). However, the obstacles if installing without formatting, among others, are that the Document etc, folder can’t be reopened, this is due to the security folder of the username that has been created before.

To prevent the above, after completing the installation of Windows, it is better for us to move the location of the folder to another partition, here is the guide:

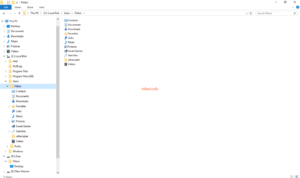
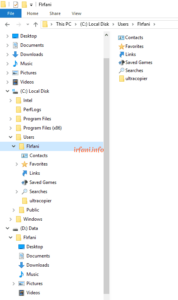
  1. As you can see in the following image, the Windows 10 that I have finished installing will create a folder of Documents etc in that username I created, which is FIrfani. For the partition I made 2, namely C for the system and D for the data (still empty).

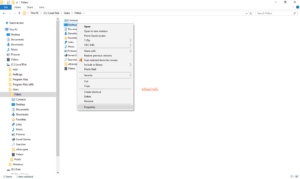
  1. I will move the location of the folders that I think are important, namely Desktop, Documents, Downloads, Music and Picture, because usually I put the data in those folders, please if you want to move  other folders, because the process remains the same. Right-click on the Desktop folder and select Properties.

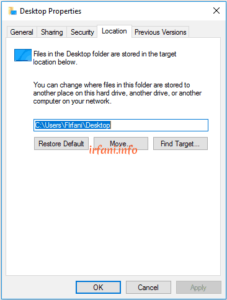
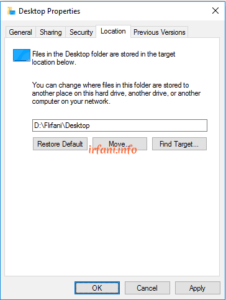
  1. In Desktop Properties, select the Location tab, you will see the location path, select Move to select a new location, but usually I just change from the existing path, which is by typing D:\FIrfani\Desktop and then clicking OK.

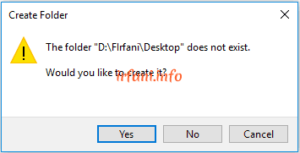
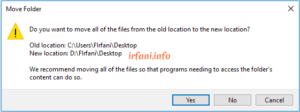
  1. A popup will appear regarding the location that is not yet available and will be created, select Yes to create it and select Yes again for the process of moving the contents of the

  1. The result should look like the following image, where it has moved from C:\Users\FIrfani\Desktop to D:\FIrfani\Desktop.

  1. Do the same way as steps 2 through 4 to move the other folders.
  1. If everything has been moved, then the result will be as follows:

In this case, you will save time if later Windows needs to be reformed, there is no need to back up data, unless you want to keep the backup in another location, just do the above step by adjusting the location path of the old folder before and the old data will look like before. Thanks.


D-Link DSL-2730E PPPoE Manual

D-Link DSL-2730E PPPoE Manual

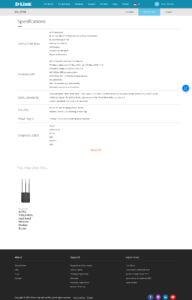
For you Telkom Speedy ADSL customers, you may already know that every internet installation has received a modem from Telkom consisting of various brands. In this case I provide a PPPoE guide if you have or get a D-Link ADSL DSL-2730E modem, here is a display of the specifications from the website:

Here are the devices needed and PPPoE guidelines for the modem:

  • Laptop (IP DHCP)
  • Cable LAN
  • Telephone cable


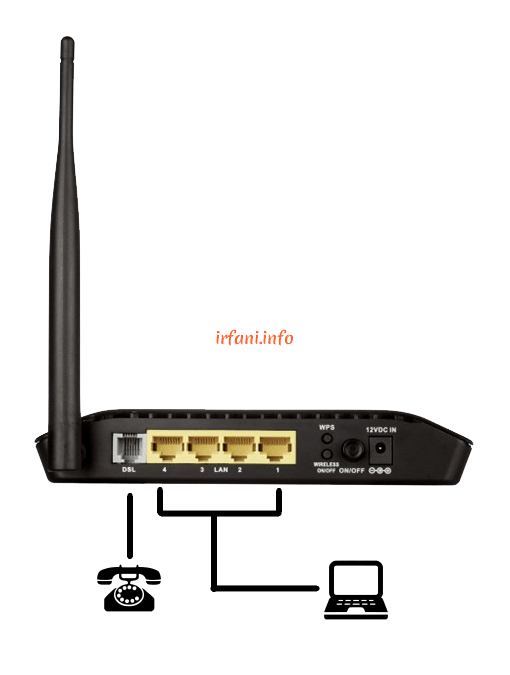
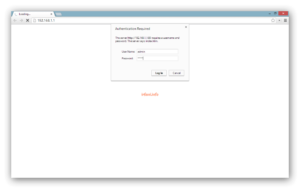
  1. Connect the phone cable to the DSL port and connect the LAN cable on the laptop and on the other end of the cable connect to the LAN port on the modem (topology as shown in the top image). Open a browser and type in the default IP of the modem, which is 192.168.1.1 and type admin in the User Name and Password fields, then click Log In.

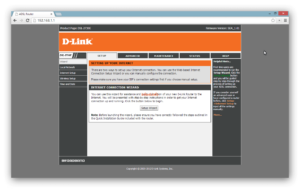
  1. Click on the Setup Wizard.

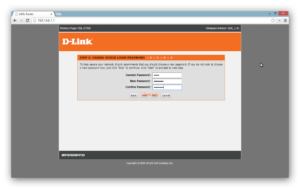
  1. In the first step, it is recommended to change the login password first, click Next.

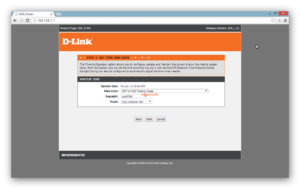
  1. The second step is to adjust the time for the modem, click Next.

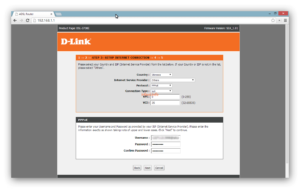
  1. The third step is to adjust the configuration of the ISP such as VPI, VCI and PPPoE username and password, if you don’t know it, please contact the relevant ISP, click Next.

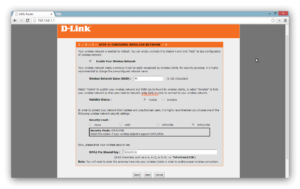
  1. The fourth step is to configure the wireless name and password, click Next.

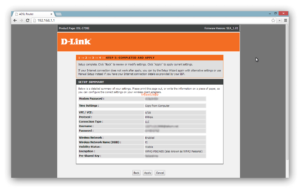
  1. The last step is the conclusion from steps 1 to 4, click Apply.

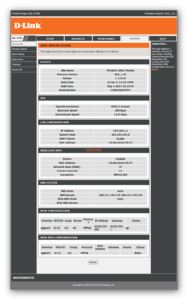
  1. The following is the status if you have successfully logged in to the PPPoE dial. Currently, the laptop has successfully connected to the internet either via LAN cable or wireless.

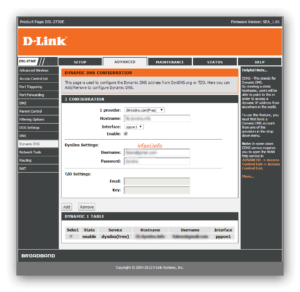
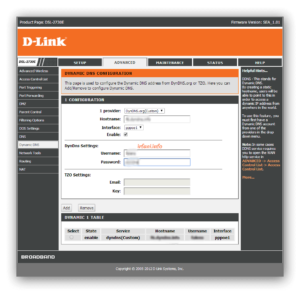
  1. D-link provides free DDNS for its router users for remote distances, select Advanced – Dynamic DNS and select com (Free), if you don’t have an account you can register here.

  1. Or if you have another DDNS account, it can be adjusted to the existing options.

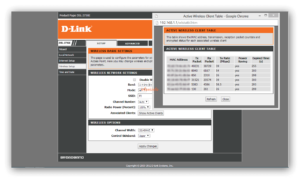
  1. To view the devices connected to wireless, select Setup – Wireless Setup – Show Active Clients.

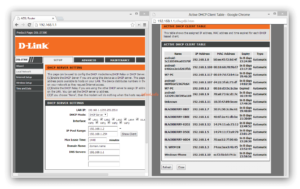
  1. To view all connected devices either via LAN or wireless, select Setup – Local Network – Show Client.

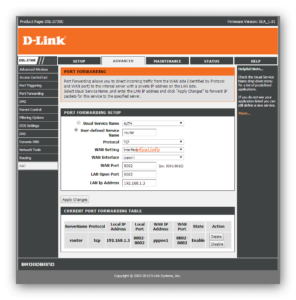
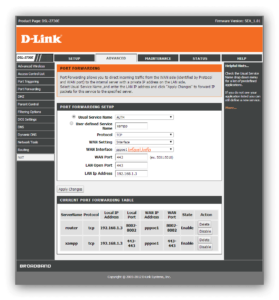
  1. If you have CCTV, applications or other devices that you want to access from outside the house, we can set up Port Forwarding. Click Advanced – NAT, adjust it to the application name, protocol, port and local IP used, then click Apply Changes.

Good luck and thank you.
Update: DDNS D-Link has been unusable since July 2, 2020.