Windows 11 PPPoE Guide

Windows 11 PPPoE Guide

I made this guide if you experience problems such as a slow internet connection or inappropriate bandwidth where the current internet connection uses a router (which is generally used with other devices around at the same time). So it is expected to get maximum results by using only 1 device as a comparison with a router.

Please also make sure that the transmission medium from the ISP is an RJ 45 ethernet cable to connect with a laptop device. The topology used in the guide is as follows and can be adjusted to the conditions in the location :

ISP <–> wall jack <==> router to ISP <–> wall jack <==> laptop

<–> = transmission media

<==> = cable ethernet RJ 45

  1. Connect the LAN cable from the walljack to the laptop and make sure there are no crosses.
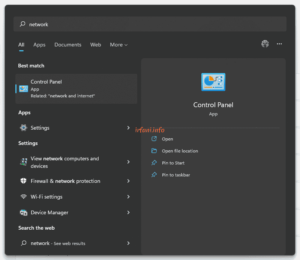
  2. Click Start or the Search icon and type network, select Control Panel.

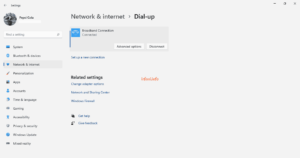
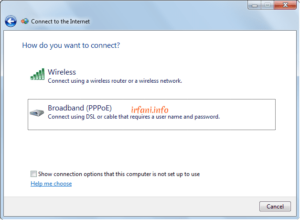
  1. Click Dial-up – Set up a new connection – Connect to the Internet then Next.


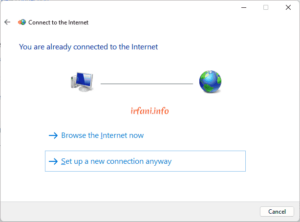
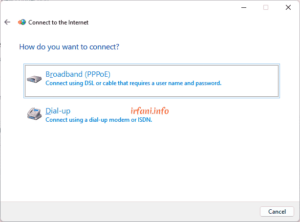
  1. Sorry, because previously I was still connected to the internet, select Set up a new connection anyway – Broadband (PPPoE).

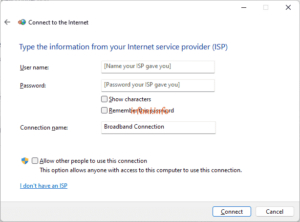
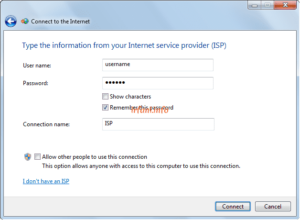
  1. Fill in the username and password provided by the ISP, if you use multiple ISPs, it is recommended that the connection name be given the name of the ISP, then click Connect.

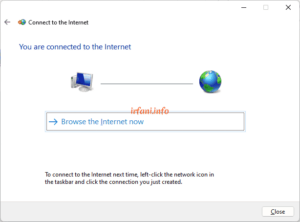
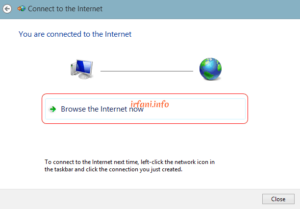
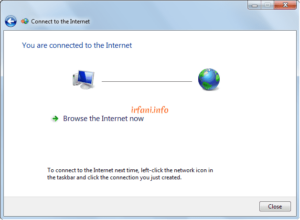
  1. If successful, it will appear as shown in the following image and the LAN indicator has changed to Connected, click Browse the Internet now to start browsing or click Close to close the window, if the image does not appear as below or a certain error appears, you can ask the ISP, until this step the PPPoE guide has been completed.

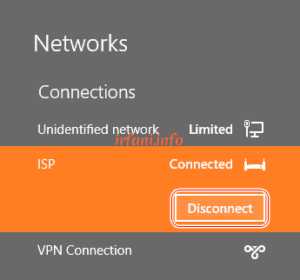
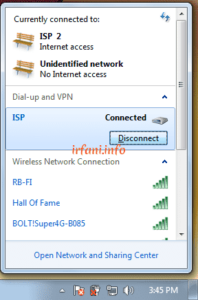
  1. Don’t forget to disconnect when you’re done so that the connection session doesn’t “hang” from the ISP’s side. Still the same as the display in step 3, select the name of the PPPoE and then click Disconnect.

If you are still experiencing slowdowns or inappropriate bandwidth, please contact the relevant ISP.

Note: this connection is not related to a pre-configured IP address so a static/dynamic IP is not required, as it will get a new IP address obtained from the ISP, generally in the form of a Public IP.

For other Windows PPPoE , you can see it in Windows XP and Windows 8. Good luck and a great day. Thanks.

 

D-Link DSL-2730E PPPoE Manual

D-Link DSL-2730E PPPoE Manual

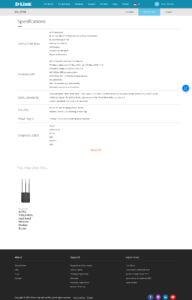
For you Telkom Speedy ADSL customers, you may already know that every internet installation has received a modem from Telkom consisting of various brands. In this case I provide a PPPoE guide if you have or get a D-Link ADSL DSL-2730E modem, here is a display of the specifications from the website:
Here are the devices needed and PPPoE guidelines for the modem:

  • Laptop (IP DHCP)
  • Cable LAN
  • Telephone cable


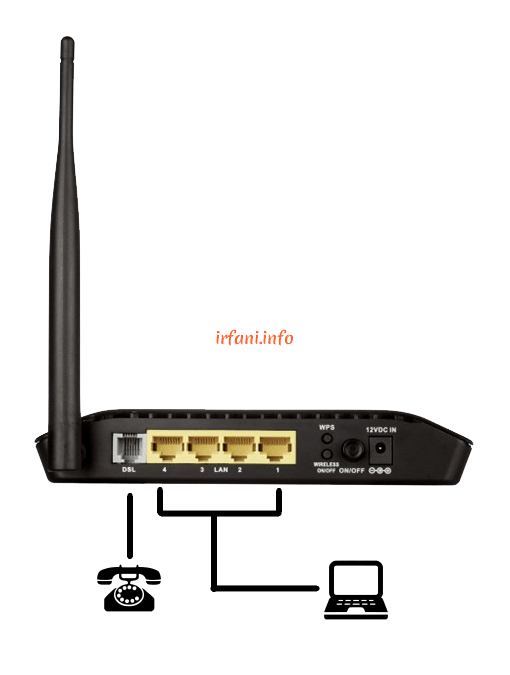
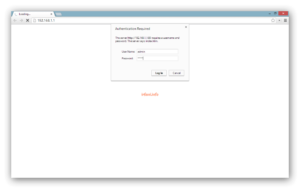
  1. Connect the phone cable to the DSL port and connect the LAN cable on the laptop and on the other end of the cable connect to the LAN port on the modem (topology as shown in the top image). Open a browser and type in the default IP of the modem, which is 192.168.1.1 and type admin in the User Name and Password fields, then click Log In.
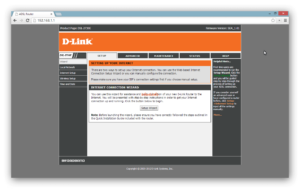
  1. Click on the Setup Wizard.

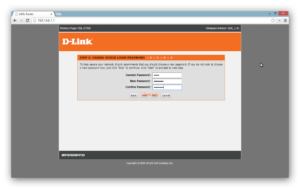
  1. In the first step, it is recommended to change the login password first, click Next.

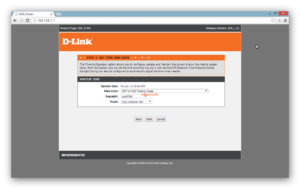
  1. The second step is to adjust the time for the modem, click Next.

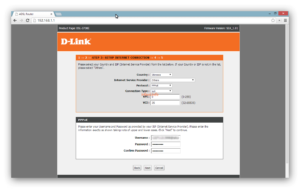
  1. The third step is to adjust the configuration of the ISP such as VPI, VCI and PPPoE username and password, if you don’t know it, please contact the relevant ISP, click Next.

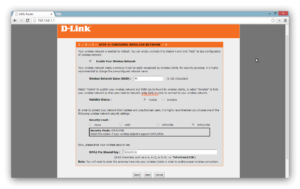
  1. The fourth step is to configure the wireless name and password, click Next.

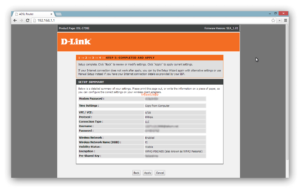
  1. The last step is the conclusion from steps 1 to 4, click Apply.

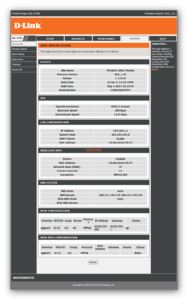
  1. The following is the status if you have successfully logged in to the PPPoE dial. Currently, the laptop has successfully connected to the internet either via LAN cable or wireless.

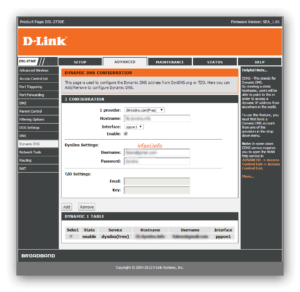
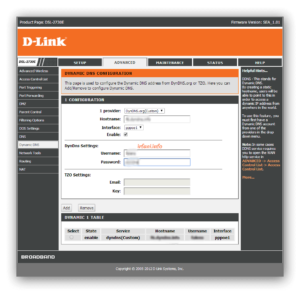
  1. D-link provides free DDNS for its router users for remote distances, select Advanced – Dynamic DNS and select com (Free), if you don’t have an account you can register here.

  1. Or if you have another DDNS account, it can be adjusted to the existing options.

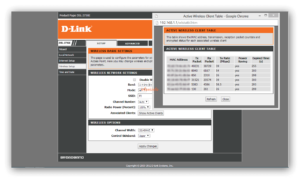
  1. To view the devices connected to wireless, select Setup – Wireless Setup – Show Active Clients.

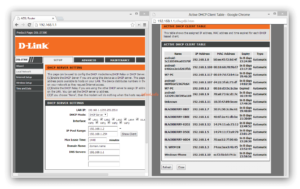
  1. To view all connected devices either via LAN or wireless, select Setup – Local Network – Show Client.

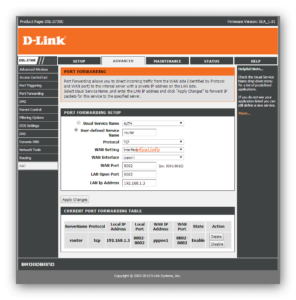
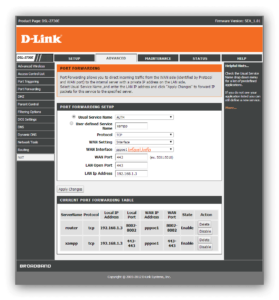
  1. If you have CCTV, applications or other devices that you want to access from outside the house, we can set up Port Forwarding. Click Advanced – NAT, adjust it to the application name, protocol, port and local IP used, then click Apply Changes.

Good luck and thank you.

Update: DDNS D-Link has been unusable since July 2, 2020.


Windows 8 & 8.1 PPPoE Guide

Windows 8 & 8.1 PPPoE Guide

This guide is similar to the one I have created before here, for the purpose and topology is also the same, only the steps are different. Here’s how PPPoE in Windows 8 & 8.1.

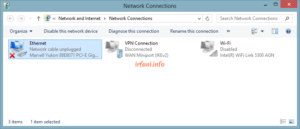
  1. Make sure the Ethernet status is Enabled and the cross (LAN cable please remove first) as shown above, to make sure it right-click the LAN icon at the bottom right and select Open Network and Sharing Center.
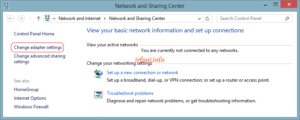
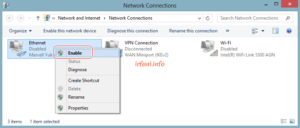
  2. In the Network and Sharing Center window, click Change adapter settings, make sure the Ethernet to be used is Enabled, if it is still Disabled, right-click the Ethernet and select Enable, it will change to Enable with a cross. If Ethernet does not appear, please make sure that the driver is installed correctly.

  1. Connect the end of the LAN cable to the wall jack) and the other end of the cable to a PC or laptop, the LAN indicator will turn into an exclamation mark, if you still get a cross, you must check the LAN cable and the connected device (port or configuration).

Note: this connection is not related to a pre-configured IP address so a static/dynamic IP is not required, as it will get a new IP address obtained from the ISP, generally in the form of a Public IP.

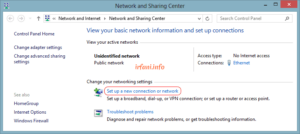
  1. Back to Network and Sharing Center then click Set up a new connection or Network.

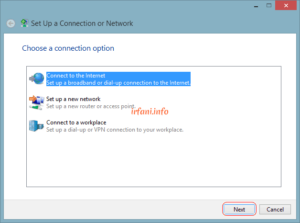
  1. Select Connect to the Internet and then Next.

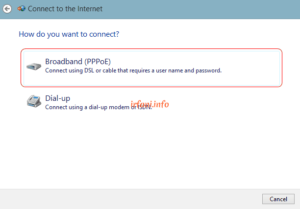
  1. Select Broadband (PPPoE).

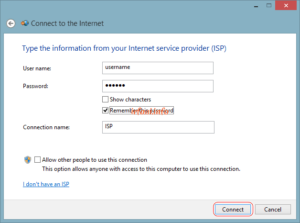
  1. Fill in the username and password provided by the ISP, if you use multiple ISPs, it is recommended that the connection name be given the name of the ISP, then click Connect.

  1. If successful, it will appear as shown in the following image and the LAN indicator has changed to Connected, click Browse the Internet now to start browsing or click Close to close the window, if the image does not appear as below or a certain error appears, you can ask the ISP, until this step the PPPoE guide has been completed.

  1. Don’t forget to disconnect when you’re done so that the connection session doesn’t “hang” from the ISP’s side. For that, click the LAN icon at the bottom right, select the name PPPoE and then click Disconnect.

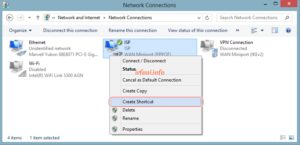
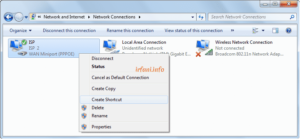
  1. To make it easier to access the PPPoE next, you can create a shortcut on the Desktop by right-clicking the PPPoE name and then selecting Create Shortcut.

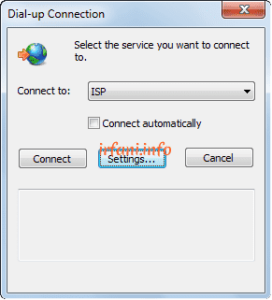
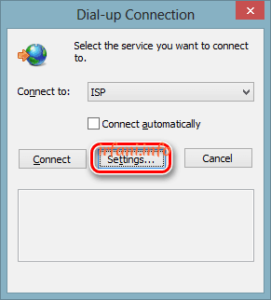
  1. If at some point the Dial-up Connection window appears like the image below, click Settings.

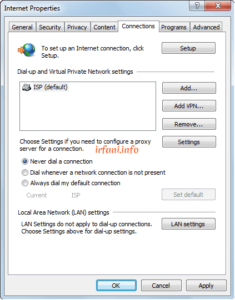
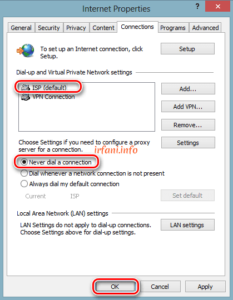
  1. On the Connections tab, select the ISP/PPPoE name and then select Never dial a connection and click OK.

If you are still experiencing slowdowns or inappropriate bandwidth, please contact the relevant ISP. Good luck and a great day.


Windows 7 PPPoE Guide

Windows 7 PPPoE Guide

This guide is similar to the one I have created before here, for the purpose and topology is also the same, only the steps are different. Here’s how PPPoE in Windows 7.

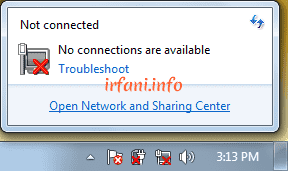
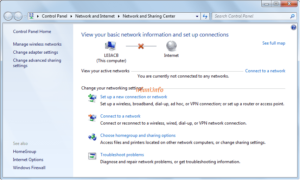
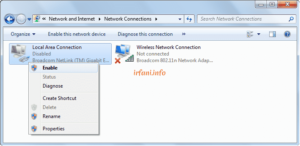
  1. Make sure the Ethernet status is Enabled and the cross (LAN cable please remove first) as shown above, to make sure it right-click the LAN icon at the bottom right and select Open Network and Sharing Center.
  2. In the Network and Sharing Center window, click Change adapter settings, make sure the Ethernet to be used is Enabled, if it is still Disabled, right-click the Ethernet and select Enable, it will change to Enable with a cross. If Ethernet does not appear, please make sure that the driver is installed correctly.

  1. Connect the end of the LAN cable to the wall jack and the other end of the cable to a PC or laptop, the LAN indicator will turn into an exclamation mark, if you still get a cross, you must check the LAN cable and the connected device (port or configuration) again.

Note: this connection is not related to a pre-configured IP address so a static/dynamic IP is not required, as it will get a new IP address obtained from the ISP, generally in the form of a Public IP.

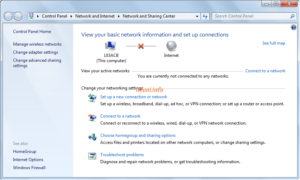
  1. Back to Network and Sharing Center then click Set up a new connection or Network.

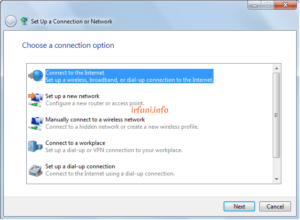
  1. Select Connect to the Internet and then Next.

  1. Select Broadband (PPPoE).

  1. Fill in the username and password provided by the ISP, if you use multiple ISPs, it is recommended that the connection name be given the name of the ISP, then click Connect.

  1. If successful, it will appear as shown in the following image and the LAN indicator has changed to Connected, click Browse the Internet now to start browsing or click Close to close the window, if the image does not appear as below or a certain error appears, you can ask the ISP, until this step the PPPoE guide has been completed.

  1. Don’t forget to disconnect when you’re done so that the connection session doesn’t “hang” from the ISP’s side. For that, click the LAN icon at the bottom right, select the name PPPoE and then click Disconnect.

  1. To make it easier to access the PPPoE next, you can create a shortcut on the Desktop by right-clicking the PPPoE name and then selecting Create Shortcut.

  1. If at some point the Dial-up Connection window appears like the image below, click Settings.

  1. On the Connections tab, select the ISP/PPPoE name and then select Never dial a connection and click OK.

If you are still experiencing slowdowns or inappropriate bandwidth, please contact the relevant ISP. Good luck and a great day.


TP-Link TL-WR941ND Router PPPoE Guide

TP-Link TL-WR941ND Router PPPoE Guide

Before following the following guide, make sure the position of the PC / laptop and LAN cable are correct as shown above.

Topology:

wall jack <—> (Internet/WAN port) router (Ethernet 1-4 port) <—> laptop / PC

                     <—> = LAN cable

Tool :

  1. PC/laptop with Dynamic IP
  2. Cable LAN
  3. Router


  1. Connect the LAN cable from the PC/laptop to the LAN port (1-4) on the router and make sure the status on the PC/laptop is connected and there are no crosses.
  2. Connect the LAN cable from the building/apartment/wall jack to the WAN/Internet port on the router.
  3. Open a browser to log in to the router by typing 192.168.0.1 (default IP) in the Address Bar, then Enter, make sure you know the username and password. If you have logged in, please go directly to step 5 but if the address 192.168.0.1 is not open or does not remember the router username and password, it is recommended to reset it (step number 4).

For other types of routers, you can see it on the sticker installed under the router.

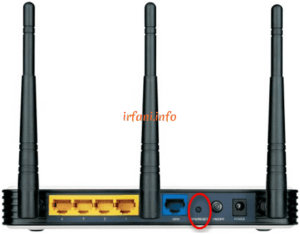
  1. To reset the router as it defaults, make sure the router is on and press the reset button on the back of the router for 5-10 seconds until the light indicator will flash at the same time.

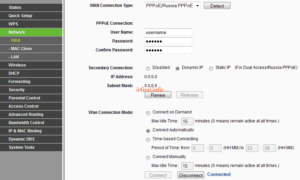
  1. On the left panel, select NetworkWAN and then select / fill in with:


WAN Connection Type : PPPoE/Russia PPPoE

User name : username-login

Password : password-login

Confirm password : password-login

Wan Connection Mode : Connect Automatically


After that, click Connect and make sure the status is Connected then click Save.


Until this step should be connected to the Internet, please try to open a site first, if successful please continue to step number 6 for wireless configuration.

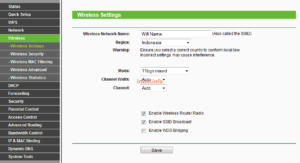
  1. On the left panel, select WirelessWireless Settings then select / fill in the following information then click Save.


SSID : wireless name

Region : Indonesia

Channel : Auto

Mode : 11bgn mixed

Channel Width : Auto

Max Tx Rate : 300 Mbps

Enable Wireless Router Radio : check if you want to activate the wireless feature

Enable SSID Broadcast : check if you want to display the wireless name

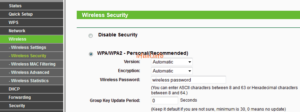
  1. To change the wireless password, select WirelessWireless Security on the left panel then select the fill in with the following information then click Save.


Select WPA-PSK/WPA2-PSK.

Version : Automatic.

Encryption : Automatic.

PSK Password : wireless password (minimal 8 character).


Until this step, you have successfully connected to the Internet via ethernet and wireless cables by entering the password first (for wireless).

Note :

There are some devices that are not compatible with the above configuration, you can do this manually by changing the selection that suits the device.

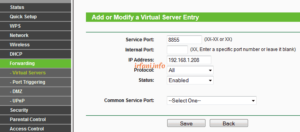
  1. If you want to use CCTV or other devices that require the Port Forward feature, select ForwardingVirtual Servers on the left panel then click Add New and fill in the following information then click Save:


Service Port : the port or range port to be used.

IP Address : The IP address of the device to be connected.

Protocol : All

Status : Enabled

Note :

Not all ISPs open the ports that will be used by the CCTV / other devices, for that you can consult the relevant ISP first.


Tested with TP-Link TL-WR941N / TL-WR941ND

Firmware Version : 3.11.8 Build 100609 Rel.61214n

Hardware Version : WR941N v2/v3 00000000


Can be used for:


TL-WR940N

TL-WR843ND

TL-WR842N / TL-WR842ND

TP-Link TL-WR841N / TL-WR841ND

TL-WR1043ND
TL-WR840N

TL-WR841HP

TL-WR743ND

TL-WR740N / TL-WR741ND

TL-WR710N

TL-WR720N

TL-WDR4300