Select Page
How to Fix “Cannot Create File” Error in Microsoft Outlook

How to Fix “Cannot Create File” Error in Microsoft Outlook

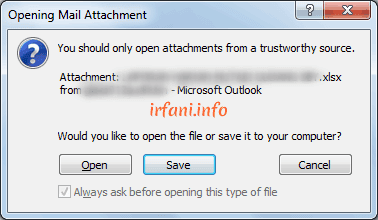
Have you ever tried to open an email attachment in Microsoft Outlook only to see this error message?

Cannot Create File error message in Microsoft Outlook

"Cannot create file: filename.xlsx. Right-click the folder you want to create the file in, and then click Properties on the shortcut menu to check your permissions for the folder."

If so, you are not alone. This is a common issue experienced by Microsoft Outlook 2007, 2010, 2013, and 2016 users on Windows 7. As a result, you cannot open or save any email attachments. This guide will walk you through the fix in just a few simple steps using the Registry Editor (regedit).

Cannot Create File error message in Microsoft Outlook

What Causes the "Cannot Create File" Error in Outlook?

This error occurs because the temporary folder used by Microsoft Outlook to temporarily store email attachments is full or has an invalid path. Once the folder reaches its limit (usually after 99 files with the same name), Outlook can no longer create new files and displays this error.

Solution: Change Temporary Folder Location via Regedit

The most effective solution is to change the Outlook temporary folder location through the Registry Editor. Follow these steps:

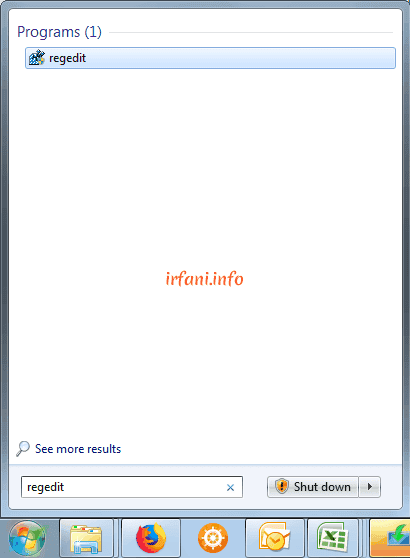
Step 1 — Open Registry Editor (Regedit)

Click Start, then in the Search programs and files box, type regedit. Click the regedit program that appears in search results.

Opening regedit through Search in Windows 7

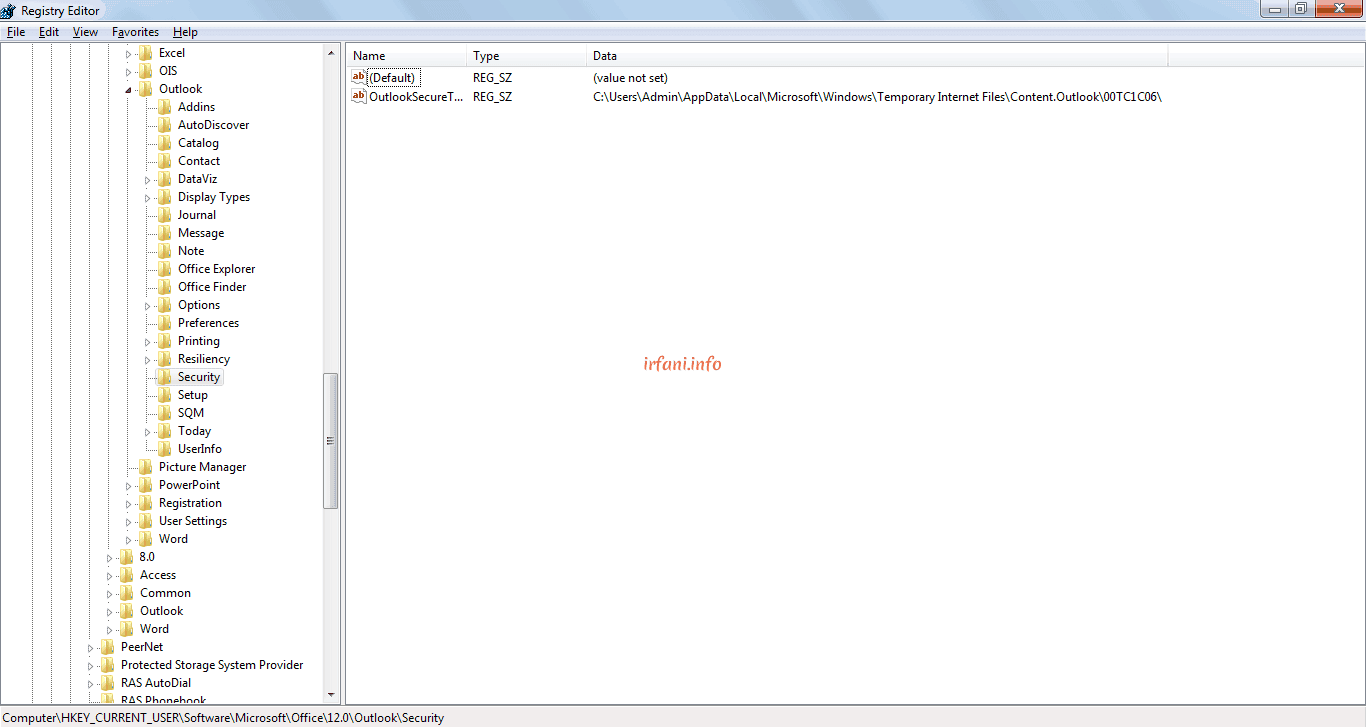
Step 2 — Navigate to the Outlook Security Key

In the Registry Editor, navigate to:

HKEY_CURRENT_USER\Software\Microsoft\Office\<version>\Outlook\Security

Replace <version> with your Microsoft Office version number:

Outlook Version Version Number
Outlook 2016 16.0
Outlook 2013 15.0
Outlook 2010 14.0
Outlook 2007 12.0
Outlook 2003 11.0
Outlook XP 10.0

Navigating to Outlook Security key in Registry Editor

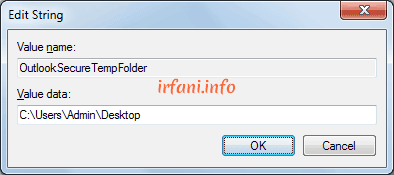
Step 3 — Edit OutlookSecureTempFolder

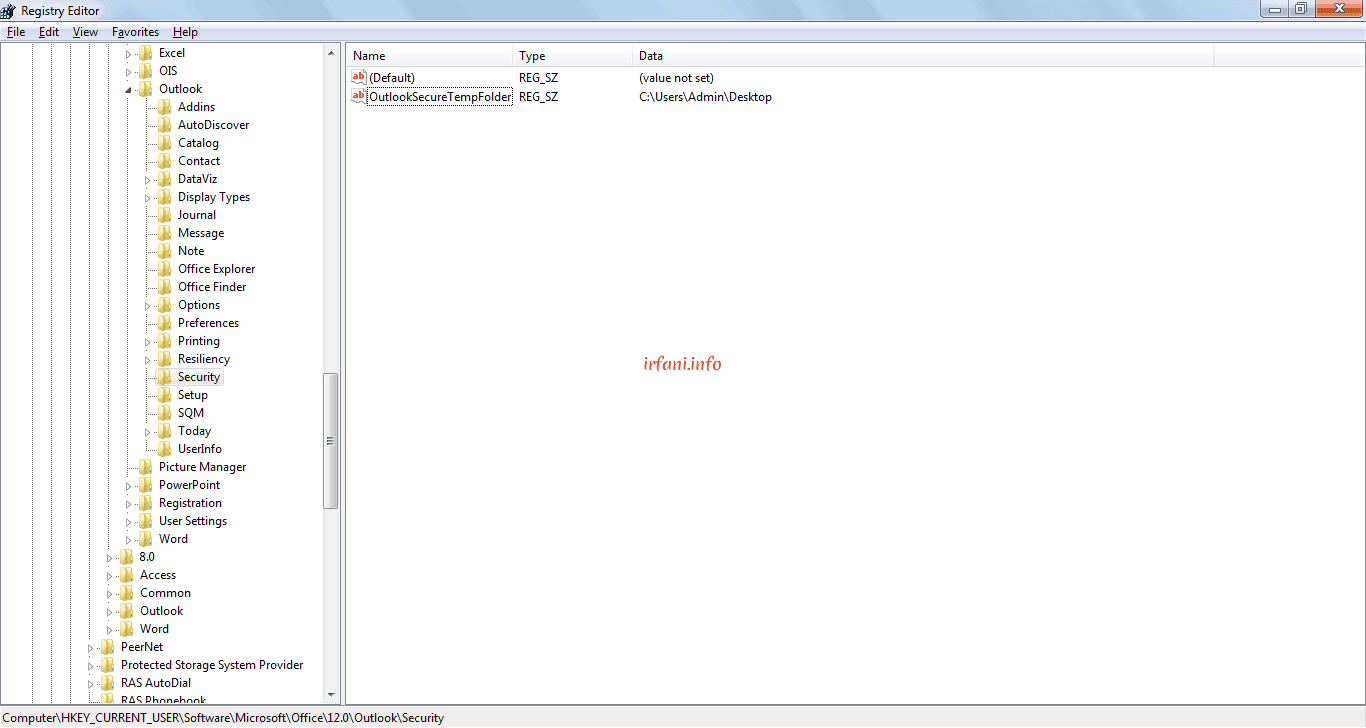
In the right panel, find and double-click OutlookSecureTempFolder. The Edit String window will open. In the Value data field, enter a new valid folder path:

C:\Users\Admin\Desktop

Click OK to save changes.

Double-clicking OutlookSecureTempFolder in Registry Editor

Changing the OutlookSecureTempFolder value data to new folder path

Step 4 — Restart Microsoft Outlook

Fully close Microsoft Outlook and reopen it. Try opening an email attachment again — the "Cannot Create File" error should no longer appear. ✅

Additional Tips

  • Create a dedicated folder for Outlook temporary files such as C:\OutlookTemp for easier management.
  • Avoid using the Desktop as a permanent location as it may become cluttered with temporary files.
  • If the error persists try deleting all files inside the old temporary folder before changing its location.

Conclusion

The "Cannot Create File" error in Microsoft Outlook is caused by a full or invalid temporary folder. The fix is straightforward — change the OutlookSecureTempFolder value in the Registry Editor to a new valid path. This works for Outlook 2007, 2010, 2013, and 2016 on Windows 7. Hope this helps! 😊

FAQ

Q: What causes the "Cannot Create File" error in Microsoft Outlook?

A: The error is caused by Outlook's temporary folder being full (usually after 99 files with the same name) or having an invalid path.

Q: Does this fix work for Outlook 2016?

A: Yes — just change the version number in the registry path to 16.0.

Q: Is it safe to edit the Windows registry?

A: Yes, as long as you only modify the specific value mentioned in this guide.

Q: What if OutlookSecureTempFolder is not found in the registry?

A: Right-click in the right panel, select New → String Value, name it OutlookSecureTempFolder, then set the value to your desired folder path.


How to Connect PPPoE on Windows XP Without a Router — Complete Guide

How to Connect PPPoE on Windows XP Without a Router — Complete Guide

Is your internet connection slow or is the bandwidth not matching your subscribed plan? One of the best ways to verify your actual internet speed is by connecting via PPPoE directly from your Windows XP PC to your ISP — without a router in between.

This method allows you to measure the real internet speed from your ISP without any router interference. This guide will walk you through every step from preparation to a successful connection. 🚀

⚙️ Requirements

Before you begin, make sure you have:

  • An Ethernet cable (RJ45) connected directly from the ISP/wall jack to your PC
  • A PC or Laptop running Windows XP
  • Your PPPoE username and password from your ISP (contact ISP customer service if needed)

🔌 Connection Topology

Here is the connection diagram for this setup:

ISP  <-->  Wall Jack  <==>  PC / Laptop

Legend: <--> = ISP transmission media  |  <==> = Ethernet cable (RJ45)

🚀 Step-by-Step PPPoE Setup on Windows XP

Step 1 — Connect the Ethernet Cable to Your PC

Unplug the cable from your router and connect it directly to your PC/laptop's LAN port. Make sure the Ethernet is enabled — no red X icon (❌), and the indicator should show an exclamation mark (⚠️) indicating the cable is connected but not yet authenticated.

PPPoE setup Windows XP ethernet connection status warning icon

    Step 2 — Open Network Connections

    Go to Control Panel → click Network Connections

    Open network connections in Windows XP control panel

    Step 3 — Launch the New Connection Wizard

    In the left panel, click Create a new connection to open the New Connection Wizard

    New connection wizard Windows XP setup

    Step 4 — Select Connection Type

    Follow these steps in the wizard:

    1. Click Next on the first page
    2. Select "Connect to the Internet" → click Next
    3. Select "Set up my connection manually" → click Next
    4. Select "Connect using a broadband connection that requires a user name and password" → click Next
    5. Enter your ISP Name (any name, e.g. MyISP) → click Next.

    Step 5 — Enter Username and Password

    Enter your PPPoE username and password provided by your ISP, then click Next. Make sure there are no typos as the password is case-sensitive.

    Enter username and password PPPoE Windows XP

    Step 6 — Create a Desktop Shortcut

    Check "Add a shortcut to this connection to my desktop" for easy access, then click Finish.

    Add shortcut to desktop PPPoE connection Windows XP

    Step 7 — Connect to the Internet

    Double-click the PPPoE shortcut on your desktop → click Connect. If your credentials are correct, the connection status will change to Connected. ✅.

    Step 8 — Test Internet Speed

    Once connected, run a speed test to verify your bandwidth. Visit fast.com or speedtest.net in your browser. Note down the download and upload speed results.

    Internet speed test result after PPPoE connection

    Step 9 — Disconnect When Done

    When finished, right-click the connection icon in the system tray → select Disconnect. Reconnect the cable to your router as usual.

    Disconnect PPPoE connection Windows XP

    ❗ Troubleshooting

    If you encounter any issues, try these steps before contacting your ISP:

    Problem

    Solution

    Connection failed / Error 691

    Check your username and password — ensure no typos and caps lock is off

    Connection failed / Error 678

    Check the ethernet cable, try a different cable or LAN port

    Slow internet after connecting

    Restart the ISP modem, wait 2-3 minutes, then run the speed test again

    Bandwidth not matching plan

    Run the speed test 2-3 times at different times, then contact ISP if still inconsistent

    Ethernet not detected

    Make sure the LAN card driver is properly installed in Device Manager


    ✅ Conclusion

    By connecting via PPPoE directly from Windows XP to your ISP without a router, you can:

    • Measure the actual internet speed from your ISP without router interference
    • Compare router performance against a direct connection
    • Accurately troubleshoot network issues

    Hope this guide is helpful and your internet runs smoothly! 😊

    FAQ

    Q: Can this method be used on Windows 7 or Windows 10?

    A: Yes! The concept is the same. On Windows 7/10, go to Network and Sharing Center → Set up a new connection → Broadband (PPPoE). The steps are slightly different but the idea is identical.

    Q: Is a direct PPPoE connection faster than using a router?

    A: Not necessarily faster, but it gives a more accurate reading of your actual ISP speed without any router-related factors affecting the result.

    Q: Is the PPPoE username and password the same as my WiFi password?

    A: No. The PPPoE username and password are credentials provided by your ISP for internet authentication, separate from your WiFi password which you set yourself.

    Q: What should I do after finishing the test?

    A: Disconnect the PPPoE connection, unplug the cable from your PC/laptop, and reconnect it to your router so other devices can use the internet again.